I recently upgraded my television from a Philips 28" widescreen tube to a 1080p Panasonic 42" plasma. My old Sony PlayStation 2 was now looking a little weak when upscaled to 42" so I decided to invest in some component cables to take advantage of the best output that the PS2 had to offer as well as enabling "Progressive Scan Mode" in some supporting games (Guitar Hero 2 for example).
Here are my step by step instructions on how to HD-enable your PlayStation2.
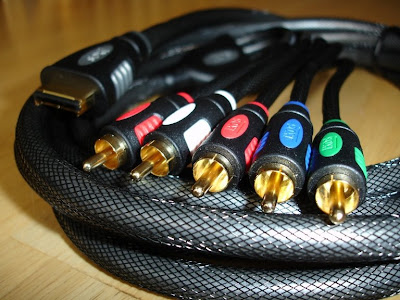
I spent a lot of time reading all sorts of reviews of PS2 component cables and it seemed that people were having mixed results with the cables in the £5-£15 bracket. After some searching about I found a PS3 to 5 RCA (component) cable from IXOS which also works with the PS2 (they use the same AV connector):
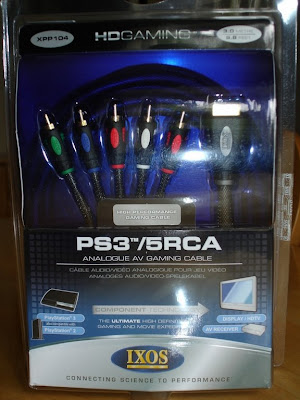
It's the IXOS XPP104 which is strangely not listed under their PS2 section but under their PS3 section instead (although it does state on the page that it's the "XPP104 PS2 & PS3 Component Video + Analogue Audio" cable). I bought mine from Sound & Vision for £30.
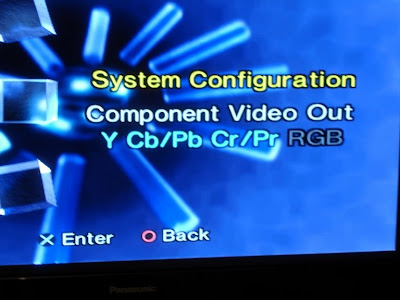
Press down on the controller until the screen changes to the "Component Video Out" option and select "Y Cb/Pb Cr/Pr" rather than "RGB", then press circle to go back and then power off your PS2:
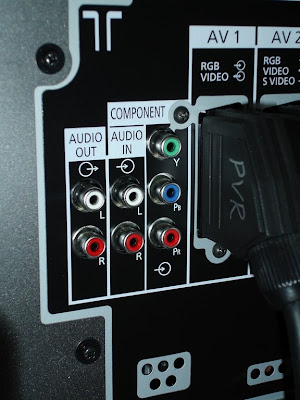
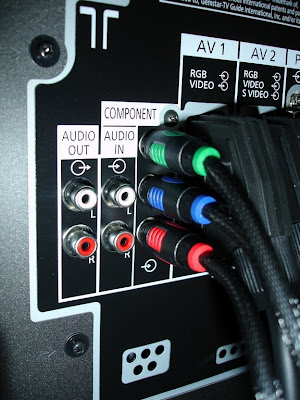
Plug the Green/Blue/Red non-audio cables into the Y/Pb/Pr sockets:
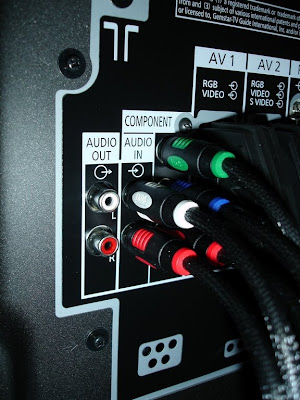
Plug the Red & White audio cables (clearly marked AUDIO on the IXOS cables) into the Audio In sockets:
Then plug the other end into the back of your PS2.
That's the tricky bit done so now pop in your favourite game to see what it looks like. Even without enabling the in-game progressive scan option I immediately noticed a much clearly steadier picture with no combing (scroll down to the tomato) which I was experiencing before the cable upgrade.
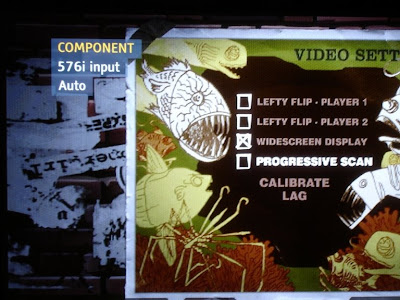
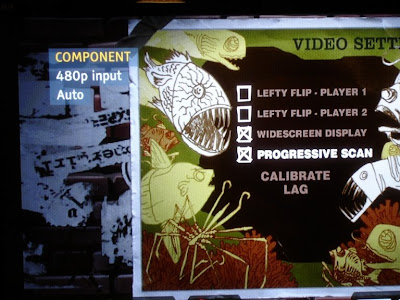
Some newer games have an option to enable "Progressive Scan" - Guitar Hero 2 is one such game. Here are a couple of shots of my TV's info display before and after enabling progressive scan:
I also read that if your game does not have an in-game option you can hold Triangle and "X" at the same time while booting up the game but this didn't work for me.
It's made a world of difference to my PS2 image quality so I think the £30 was money well spent! Oh and Wikipedia has a pretty decent list of PS2 games that support HD as well...
Technorati Tags: PlayStation2, PS2, Component, Progressive Scan, IXOS, Panasonic, Andrew Beacock
Here are my step by step instructions on how to HD-enable your PlayStation2.
Buy a quality component cable
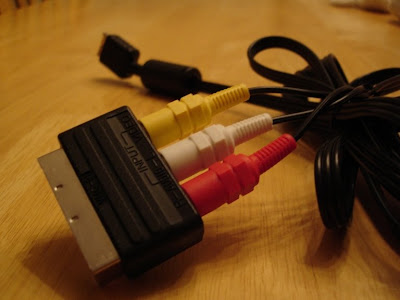
My PS2 came with some SVIDEO-style connectors and a SCART block to plug them in to. The image quality on my old TV was fine but needless to say on a 42" HD plasma things looked a little different!
I spent a lot of time reading all sorts of reviews of PS2 component cables and it seemed that people were having mixed results with the cables in the £5-£15 bracket. After some searching about I found a PS3 to 5 RCA (component) cable from IXOS which also works with the PS2 (they use the same AV connector):

It's the IXOS XPP104 which is strangely not listed under their PS2 section but under their PS3 section instead (although it does state on the page that it's the "XPP104 PS2 & PS3 Component Video + Analogue Audio" cable). I bought mine from Sound & Vision for £30.

Tell your PlayStation that you are about to use component connections
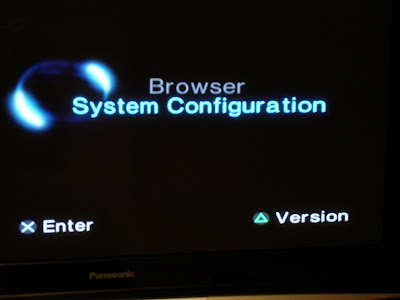
Power up the PS2 with no disc in the drive so that you get the "Browser/System Configuration" screen:
Press down on the controller until the screen changes to the "Component Video Out" option and select "Y Cb/Pb Cr/Pr" rather than "RGB", then press circle to go back and then power off your PS2:

Plug it into the component sockets of your TV
Find the video and audio component sockets on the back of your TV:
Plug the Green/Blue/Red non-audio cables into the Y/Pb/Pr sockets:

Plug the Red & White audio cables (clearly marked AUDIO on the IXOS cables) into the Audio In sockets:

Then plug the other end into the back of your PS2.
That's the tricky bit done so now pop in your favourite game to see what it looks like. Even without enabling the in-game progressive scan option I immediately noticed a much clearly steadier picture with no combing (scroll down to the tomato) which I was experiencing before the cable upgrade.
Some newer games have an option to enable "Progressive Scan" - Guitar Hero 2 is one such game. Here are a couple of shots of my TV's info display before and after enabling progressive scan:


I also read that if your game does not have an in-game option you can hold Triangle and "X" at the same time while booting up the game but this didn't work for me.
It's made a world of difference to my PS2 image quality so I think the £30 was money well spent! Oh and Wikipedia has a pretty decent list of PS2 games that support HD as well...
Technorati Tags: PlayStation2, PS2, Component, Progressive Scan, IXOS, Panasonic, Andrew Beacock
Comments
Sandra